Quickstart
💾 Install
1. Get License Key
You need to get a license key to activate Optimium.
📩 Check your e-mail
You'll receive an e-mail from us, ENERZAi.
Please double check your junk mail box if you didn't receive any message. If it's still not there, please contact [email protected].
2. Download Optimium Docker Image
Note: In this Quickstart guide, we will use the Optimium environment provided as a Docker image for convenient setup. For detailed installation instructions, please referhere .
Click the URL provided within our e-mail. It will lead you to a shared Google Drive folder as below.
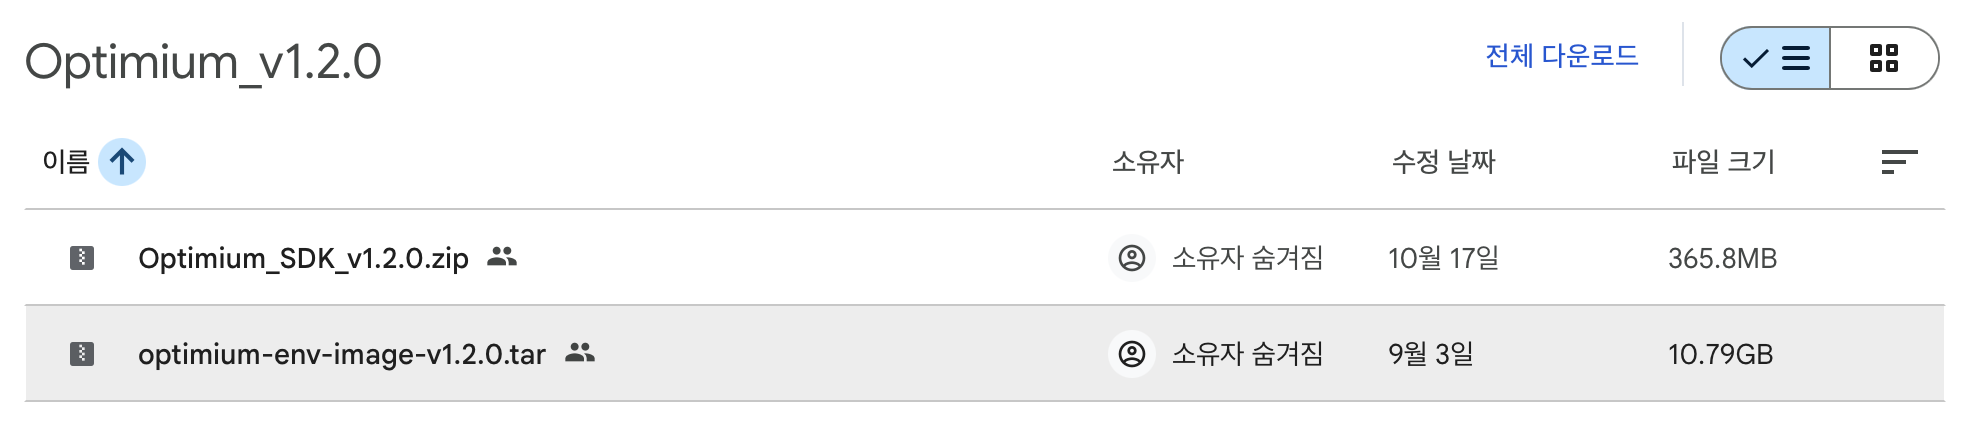
Download optimium-env-image-v1.2.0.tar from the shared folder.
3. Run Docker image as a container
Load image from tar file, where Optimium and required dependencies are installed.
docker load -i optimium-env-image-v1.2.0.tarYou can see optimium_env from your Docker image list.
$ docker images

REPOSITORY                   TAG                  IMAGE ID       CREATED           SIZE
optimium_env                 v1.2.0               c0ba2b5ada03   10 seconds ago    11.5GB
...
Run a container with loaded image.
docker run -it optimium_env:v1.2.0 /bin/bashOptional: You may mount any directory to your models, if needed.
docker run -it -v /path/to/your/workspace:/workspace optimium_env:v1.2.0 /bin/bashOnce the container starts successfully, you're all set to run Optimium!
$ root@c0ba2b5ada03:/workspace#🚀 Optimize
Before you start
1. Check files for quickstart
Note: In this guide, we will optimize "TFLite" model. To optimize PyTorch model, please see here.
Once you run a container with the provided Docker image, please ensure that the below files for this quickstart guide are present. You can also download them here and copy them into your workspace directory.
tiny_mnist_example.tflite: Simple MNIST model to compare Optimium with TF Litemnist_sample.jpg: Sample image to test Optimiumverify_output.py: Python script to compare performance & verify the output of Optimium against TFLite
cd /workspace
ls
mnist_sample.jpg  tiny_mnist_example.tflite  verify_output.py
If any of these files don't exist, please contact us [email protected].
2. Set environmental variable
Environment variable WORKING_DIR must be set before importing optimium.
WORKING_DIR is the path where Optimium-related logs and outputs are created.
In this guide, setWORKING_DIR to /workspace for clarity and ease of understanding:
cd /workspace
export WORKING_DIR=$PWD
3. Create a user argument file template
To fully optimize your model for your target hardware, you need to provide hardware information.
But don’t worry — you can simply follow the steps as prompted. (See detailed steps here)
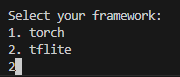
First, run Python and type as below:
import optimium
optimium.create_args_template()
Once you followed all prompted instructions, user_arguments.json will be created in your WORKING_DIR.
Note: In this guide, for better accessibility, please set options as below:
["remote"] - "address":"localhost". This indicates that the target device is "local machine that you're currently using".

["model"] - "framework":"tflite"
["optimization"] - "enable_tuning":true

Below is an example of a user_arguments.json file created (for X86_64 in this case):
{
    "license_key": null,
    "device_name": "MyDevice",
    "model": {
        "input_shapes": [
            [0, 0, 0, 0]
        ],
        "framework": "tflite",
        "tflite": {
            "fp16": false,
            "model_path": "YOUR_MODEL.tflite"
        }
    },
    "target_devices": {
        "host": {
            "arch": "X86_64",
            "os": "LINUX",
            "mattr": "auto",
        },
        "CPU": {
            "arch": "X86_64",
            "platforms": [
                "NATIVE"
            ]
        }
    },
    "runtime": {
        "num_threads": 1
    },
    "remote": {
        "address": "localhost",
        "port": null
    },
    "optimization": {
        "opt_log_key": "MyOptKey",
        "enable_tuning": true
    },
    "out_dirname": "MyOutputDir"
}
4. Modify model information
Next, enter your model information. You can find detailed instructions here.
In this guide, we will use a simple MNIST TFLite model included in the Docker image.
You can find/workspace/tiny_mnist_example.tflite once you run the container.
Once you find the model, modify model information "input_shapes","model_path"in user_arguments.json, as below.
{
  	...
    "model": {
        "input_shapes": [
            [1, 28, 28, 1]
        ],
        "framework": "tflite",
        "tflite": {
            "fp16": false,
            "model_path": "tiny_mnist_example.tflite"
        }
    },
    ...
}
2. Run Optimium
🔑 License key verification
Once you run Optimium by following the steps below, you will be prompted to enter your license key issued from us in earlier steps.

Save license key in your 'user_arguments.json'
To avoid manually entering the license key each time you run Optimium, add your license key with the key "license_key" in the user_arguments.json file you created.
# user_arguments.json
{
    "license_key": "AAAAA-BBBBB-CCCCC-DDDDD",
    "device_name": "MyDevice",
    "model": {
 				...
		},
 		...
}
If the key is valid, Optimium will automatically load and activate the license without requiring manual entry.

🚀 Optimize your model
Import optimium and call optimize_tflite_model()to optimize your model.
import optimium
optimium.optimize_tflite_model(max_trials=64)

# def optimize_tflite_model(
#     user_args_path: os.PathLike = "user_arguments.json,
#     max_trials: int = None,
# )
Arguments
user_args_path: Anos.PathLiketype indicating the filename of the user arguments JSON file you created (default:user_arguments.json). If omitted, it is assumed the file is in the directory where Python is running. You may also provide the absolute path to the file.max_trials: Aninttype that indicates the number of performance tuning trials for each operation of the model. If omitted, Optimium automatically uses the default number.
Optimium dynamically searches and tunes inference performance to suit the target hardware
Setting a high value for
max_trialsmay yield better performance but will increase the search time.For this guide, please set
max_trials=64which is sufficient for the provided example model.
🔎 Check output
Check the output in the output directory. (See output file structure).
You can find your optimized model in the pre-specified directory in your user_arguments.json file.

✅ Deploy & Test Performance
To verify and compare the optimized model with TFLite, run /workspace/verify_output.py provided in the Docker container.
Note: Change/path/to/your/optimium/output/directory at line 26 to match your output directory.
cd /workspace
python3 verify_output.py
You may copy-and-paste the code below.
# verify_output.py
import numpy as np
import time

import optimium.runtime as rt
import numpy as np
from PIL import Image

import tensorflow as tf

# Load the saved image
image_loaded = Image.open('mnist_sample.jpg')
np_img = np.array(image_loaded).astype(np.float32) / 255
np_img = np.expand_dims(
    np.expand_dims(
        np_img, axis=-1,
    ), axis=0,
)

# Set warmup, repeat count
warmup = 50
repeat = 50

# Load runtime model
ctx = rt.Context()
model = ctx.load_model("/path/to/your/optimium/output")
# model = ctx.load_model("/workspace/outputs/MyDevice-num_thread_1-MyOptKey/MyOutputDir")
req = model.create_request()

# Prepare input image
inputs = {
    model.input_tensors_info[0].name: np_img
}

# Test inference
req.set_inputs(inputs)
records = []
for _ in range(warmup + repeat):
    start_time = time.time()
    req.infer()
    req.wait()
    end_time = time.time()
    records.append((end_time - start_time) * 1000000)
optimium_infer_time = np.median(records[warmup:])
optimium_output = req.get_outputs()
output_label = np.argmax(optimium_output)


# Load the TFLite model
interpreter = tf.lite.Interpreter(model_path="tiny_mnist_example.tflite")
interpreter.allocate_tensors()

# Get input and output details
input_details = interpreter.get_input_details()
output_details = interpreter.get_output_details()
input_shape = input_details[0]['shape']
input_data = np_img

# Measure inference time
interpreter.set_tensor(input_details[0]['index'], input_data)
records = []
for _ in range(warmup + repeat):
    start_time = time.time()
    interpreter.invoke()
    end_time = time.time()
    records.append((end_time - start_time) * 1000000)
tflite_infer_time = np.median(records[warmup:])
tflite_output = interpreter.get_tensor(output_details[0]['index'])

# Compare and verify output with TFLite
are_outputs_close = np.allclose(tflite_output, optimium_output, atol=1e-5)
if are_outputs_close:
    print("\n\nOutput tensor values match!")
    print("Output Label: ", output_label)
    print(f"TFLite Inference time: {round(tflite_infer_time, 3)} us")
    print(f"Optimium Inference time: {round(optimium_infer_time, 3)} us  ({round(tflite_infer_time/optimium_infer_time, 3)}x)")
else:
    print("\n\nOutput tensor values mismatch!")
Optimium Runtime supports Python, C++, and Kotlin. For more details, please refer to this document. This page describes how to use Optimium Runtime in projects or applications.
You can simply run other examples (Python, C++, Kotlin) in our repository.
Updated 6 months ago